Contents
httpd インストール/設定
httpd をインストールしてWebサーバーを構築します。
httpd インストール
|
1 2 3 4 5 6 7 |
[root@ns ~]# yum -y install httpd インストール: httpd.x86_64 0:2.4.6-45.el7.centos 依存性関連をインストールしました: httpd-tools.x86_64 0:2.4.6-45.el7.centos mailcap.noarch 0:2.1.41-2.el7 |
httpd の設定です。
任意のディレクトリでCGIが使えるように設定します。
|
1 2 3 4 5 6 7 8 9 10 11 12 13 14 15 16 17 18 19 20 21 22 23 24 25 26 27 28 29 30 31 32 33 34 35 36 37 38 39 40 41 |
[root@ns ~]# vi /etc/httpd/conf/httpd.conf 81 # 82 # ServerAdmin: Your address, where problems with the server should be 83 # e-mailed. This address appears on some server-generated pages, such 84 # as error documents. e.g. admin@your-domain.com 85 # 86 ServerAdmin root@sjk00.local 87 88 # 89 # ServerName gives the name and port that the server uses to identify itself. 90 # This can often be determined automatically, but we recommend you specify 91 # it explicitly to prevent problems during startup. 92 # 93 # If your host doesn't have a registered DNS name, enter its IP address here. 94 # 95 ServerName www.sjk00.local:80 96 146 # 147 # AllowOverride controls what directives may be placed in .htaccess files. 148 # It can be "All", "None", or any combination of the keywords: 149 # Options FileInfo AuthConfig Limit 150 # 151 AllowOverride All 152 159 # 160 # DirectoryIndex: sets the file that Apache will serve if a directory 161 # is requested. 162 # 163 164 DirectoryIndex index.html index.cgi index.php 165 166 354 355 ServerTokens Prod 356 357 KeepAlive ON 358 [root@ns ~]# |
起動設定
|
1 2 3 4 |
[root@ns ~]# systemctl start httpd [root@ns ~]# systemctl enable httpd Created symlink from /etc/systemd/system/multi-user.target.wants/httpd.service to /usr/lib/systemd/system/httpd.service. [root@ns ~]# |
動作確認

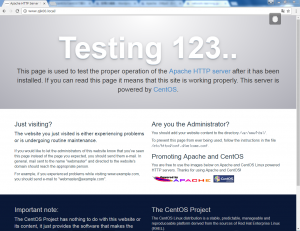
不要ページの削除(ウェルカムページ削除/デフォルトエラーページ削除)
|
1 2 3 4 |
//ウエルカムページを削除 # rm -f /etc/httpd/conf.d/welcome.conf //デフォルトエラーページの削除 # rm -f /var/www/error/noindex.html |
HTMLテストページを作成して動作確認をします。
|
1 2 3 4 5 6 7 |
<html> <body> <div style="width: 100%; font-size: 40px; font-weight: bold; text-align: center;"> Test Page </div> </body> </html> |
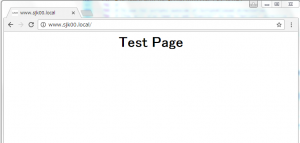
作成したテストページにWebブラウザでアクセスして、以下のようなページが表示されればOKです。

Perlのシンボリックリンク作成
|
1 2 |
//Perlのシンボリックリンク作成 # ln -s /usr/bin/perl /usr/local/bin/perl |